How to invite team members and control project access
Published · Last updated
Organization Owners and Admins send invitations from Organization Settings → Invitations. Choose Admin for access to every project, or Member for access limited to projects assigned through teams.
If you start from a connected AI assistant, use get_current_scope to confirm the authorized organization, then complete the invitation in Agiflow. MCP does not manage human invitations, roles, or team access.
At a glance
Invite the person, assign a team if they are a Member, then verify their role and project access after they accept. Owner status is managed separately and cannot be selected during invitation.
Invite a person in Agiflow
Send the invitation from Organization Settings, then use a team to control which projects a Member can open.
Prerequisites
- You are signed in as an organization Owner or Admin.
- You know whether the person needs Admin access or Member access through selected teams.
- If you want to assign a team during invitation, create the team first.
Send the invitation
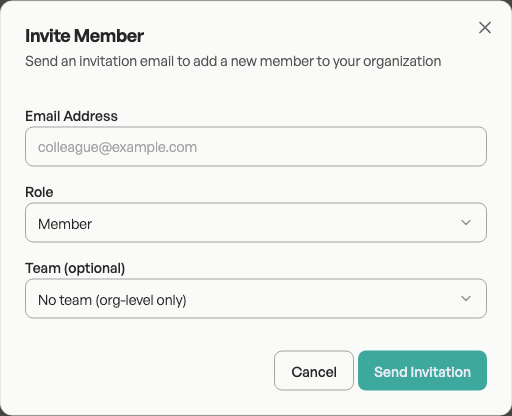
- Open Organization Settings → Invitations.
- Select Invite Member, or Invite Your First Member when no invitation exists.
- Enter the person's Email Address.
- Choose Admin or Member under Role.
- Select an optional team when the person should inherit that team's project access.
- Select Send Invitation.
Set project access with teams
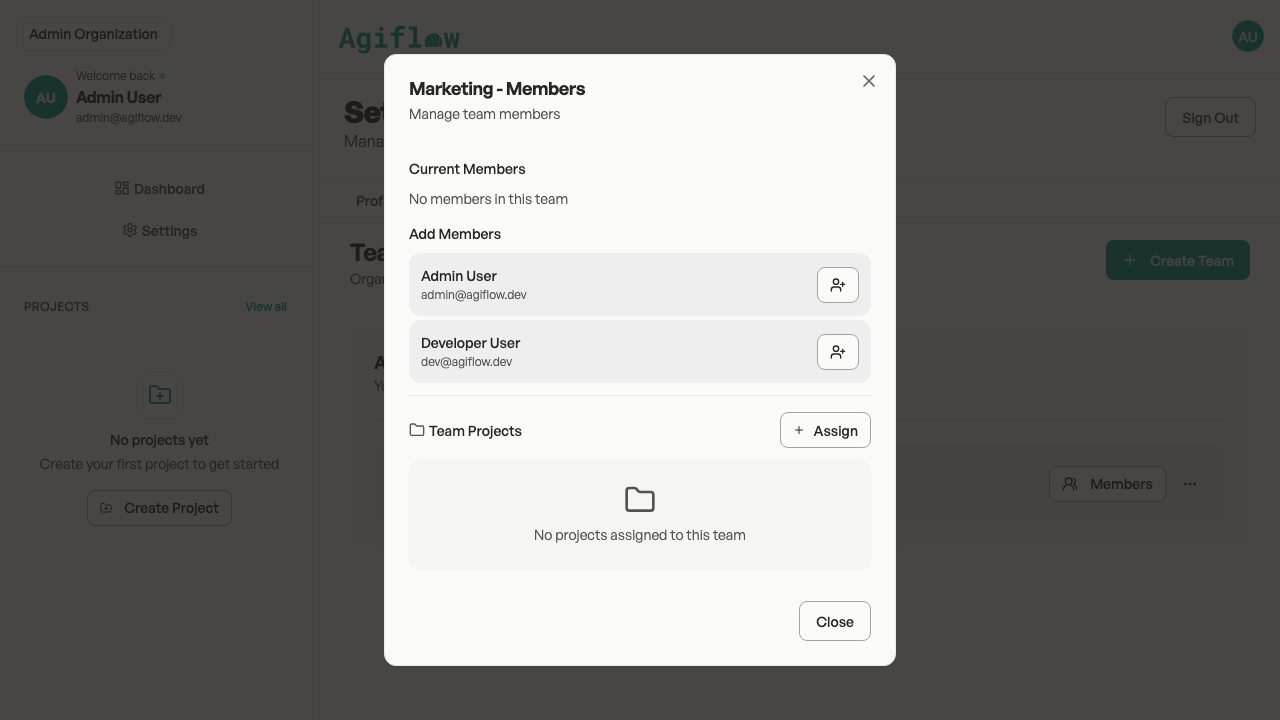
Admins and Owners can access every project. A Member can access only projects assigned to their teams. To change a Member's access, open Organization Settings → Teams, choose Members for the team, add the person, then use Assign under Team Projects to select each required project.
Expected result
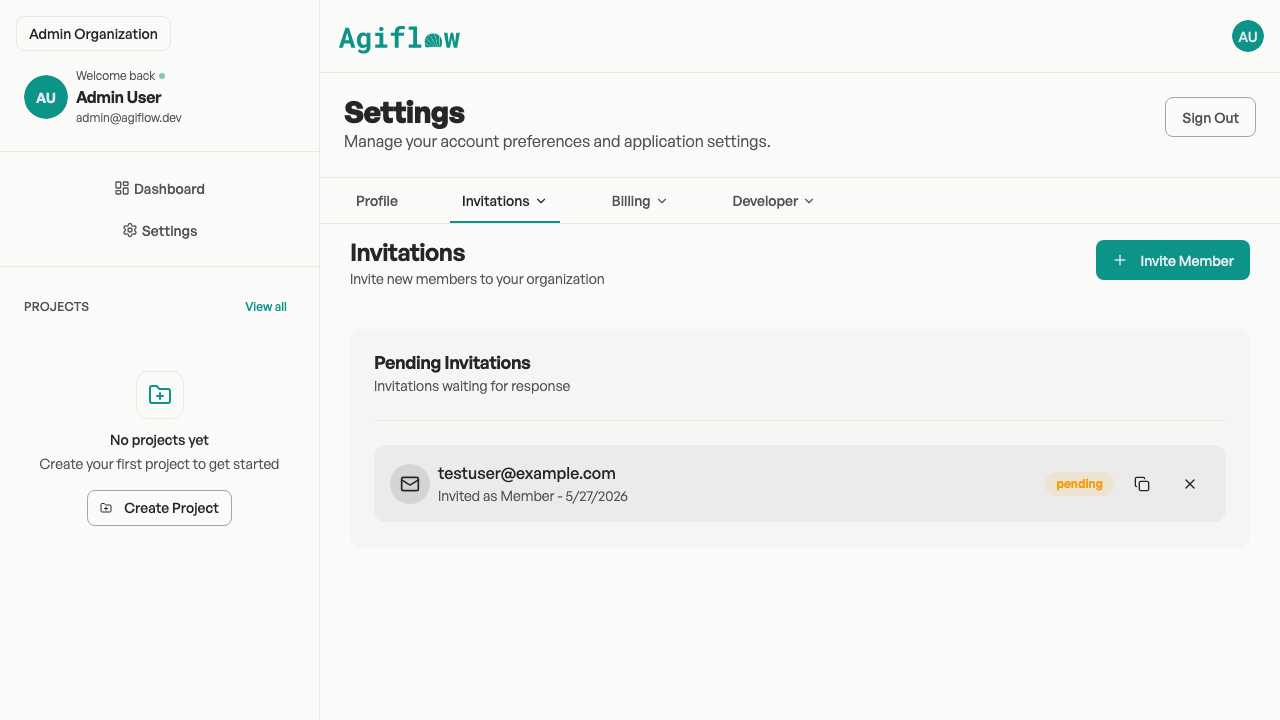
Before acceptance, the invitation appears under Pending Invitations. After acceptance, the person appears under Members with the selected role. Members can open team-assigned projects, while Admins can open every project.
Verify access
- Confirm the invitation appears under Pending Invitations.
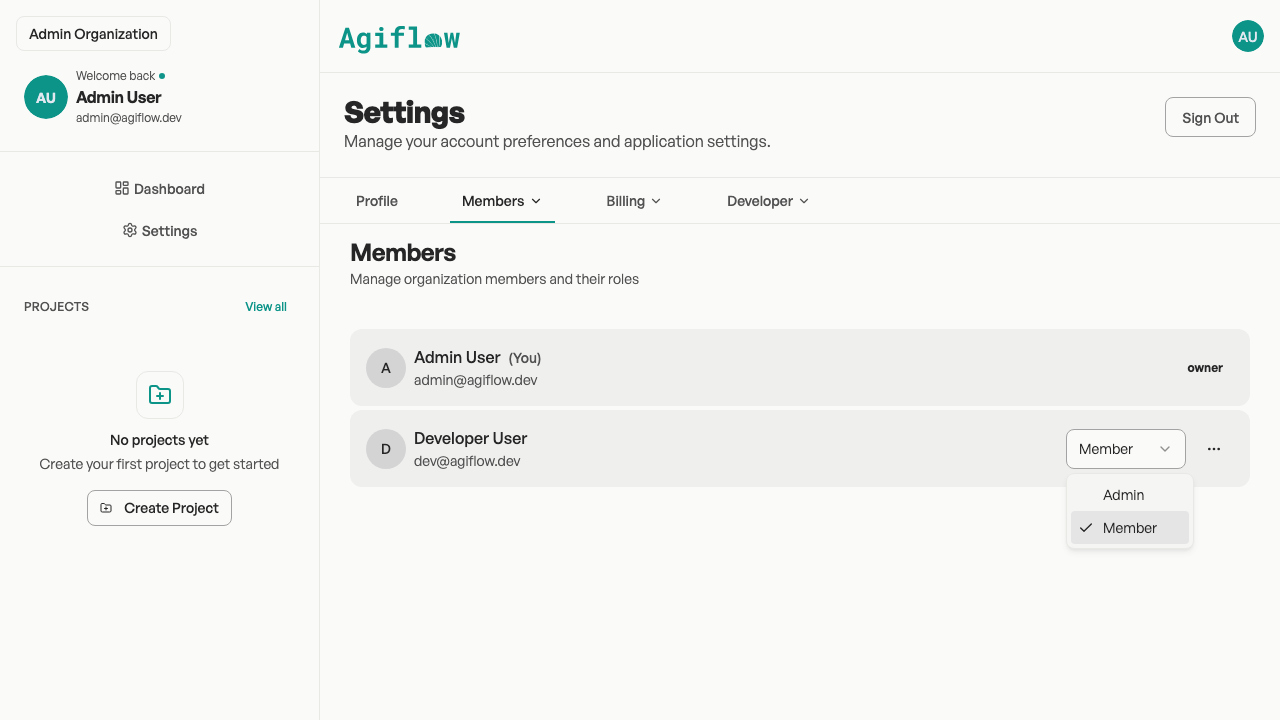
- After acceptance, confirm the person's name, email, and role under Members.
- For a Member, confirm their team membership and assigned projects under Teams.
Limitations and recovery
- If email is delayed, copy the invitation link from Pending Invitations and send it directly.
- If the address or role is wrong, cancel the pending invitation and send a new one.
- If a Member cannot open a project, verify that their team includes that project.
- Change an accepted person's role under Members. Owner status is managed separately.
Next steps
Learn how projects and tasks fit inside the organization whose access you manage.